If you have just purchased your first Chromebook ever and you are wondering what it is, you might want to watch the video; What is a Chromebook? from Google's Chromebook Youtube channel. Another video that might be useful is; 10 Things You Need To Know from the Chrome Unboxed channel.
There are two options for setting up your child's Chromebook.
There are two options for setting up your child's Chromebook.
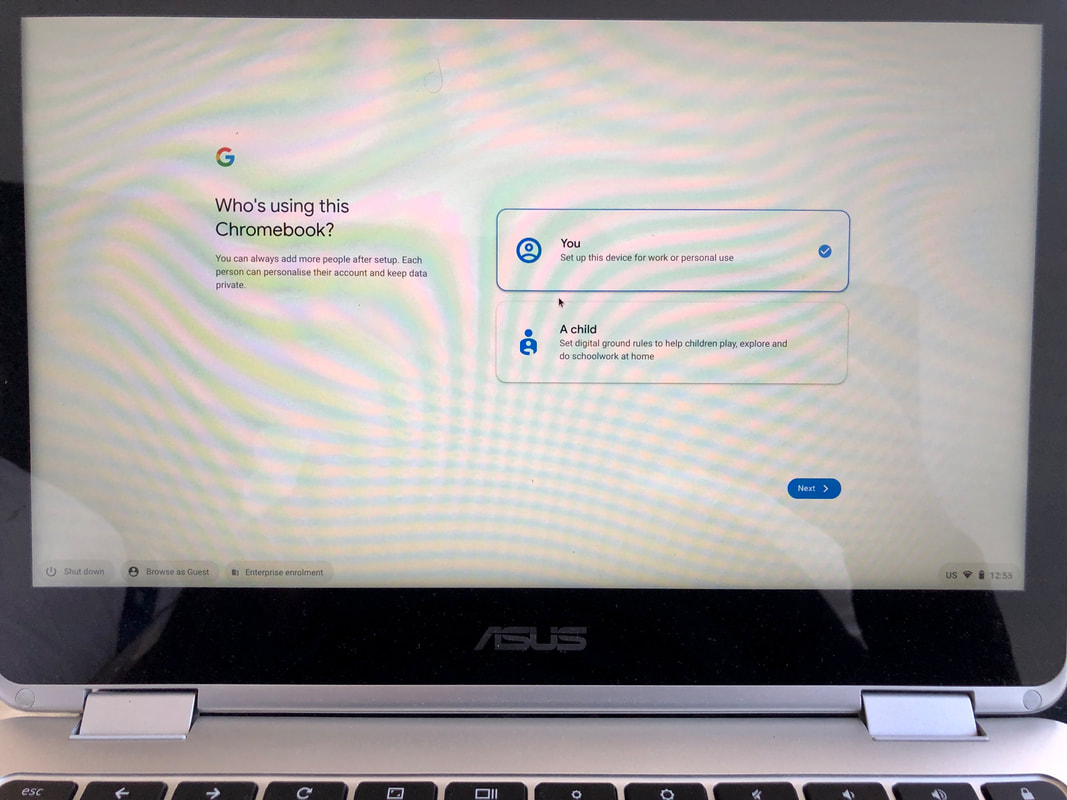
1. You
This is a quick and simple option. Although it says 'You', your child can do this independently or with very little help. After pressing the 'Next' button, they will add their school issued Google Workspace account (*****@wis.edu.na), type in their password and begin to use their Chromebook. Other users (family members) can be added to the Chromebook using personal Google Workspace accounts. Multiple people can use the Chromebook securely. No one has access to anyone's files if they sign in separately. A visitor can also use the 'Browse as a Guest' option. All files and settings will be lost as soon as they are signed out of the Guest account.
2. A Child
Some parents would like to monitor what their children do online. This option allows parents to set up and use Family Link to help students maintain a healthy media balance. It is similar to Apple's Screen Time which i wrote about here.
To use Family link, you would need to have a Google account. Your child also needs a personal Google account, in addition to their school issued Google account. The video below shows how you set up the family link app, ideally on your phone (iOS or Android) and create a personal Google account for your child, if they do not have one already. You will be able to limit screen time for your child's device(s), restrict content from your phone and approve apps they install on their Chromebook. You will also have control over who signs into your child's Chromebook.
To use Family link, you would need to have a Google account. Your child also needs a personal Google account, in addition to their school issued Google account. The video below shows how you set up the family link app, ideally on your phone (iOS or Android) and create a personal Google account for your child, if they do not have one already. You will be able to limit screen time for your child's device(s), restrict content from your phone and approve apps they install on their Chromebook. You will also have control over who signs into your child's Chromebook.
Video from InCharge DIY
After setting up Family Link on your phone, you will set up your child's Chromebook using the 'A Child' option shown in the image above. After pressing the 'Next' button you will
- Sign in with your child's Google Account. This is your child's personal Google account (****@gmail.com), not the school issued account.
- Complete the parental permission by entering your gmail account and password.
- Review settings for your child. You can skip this and do it on your phone later.
- Add your child's school account (*****@wis.edu.na) to allow them to access school sites like Google Classroom and Drive as shown in the video below. Your child will need to enter their password for their school account.
Video from Google For Education
The school controls what your child does with their school account. You control what they do on their personal account using the Family Link app. Students will not be able to use the 'Browse as guest' option to browse anonymously. They will need a pin from their parent to 'Add Another User' to the Chromebook.
|
Family Link is a good tool to monitor what your child does online, however, it is not a sealed lock. Other parents may choose the easy, quick option of letting their child set up their own Chromebook. This allows them to lend your child their device, 'Browse As a Guest' and do as they please. As always, having frequent, open discussions with your child will help them make good choices whether they are being suprvised or not.
|

|
 RSS Feed
